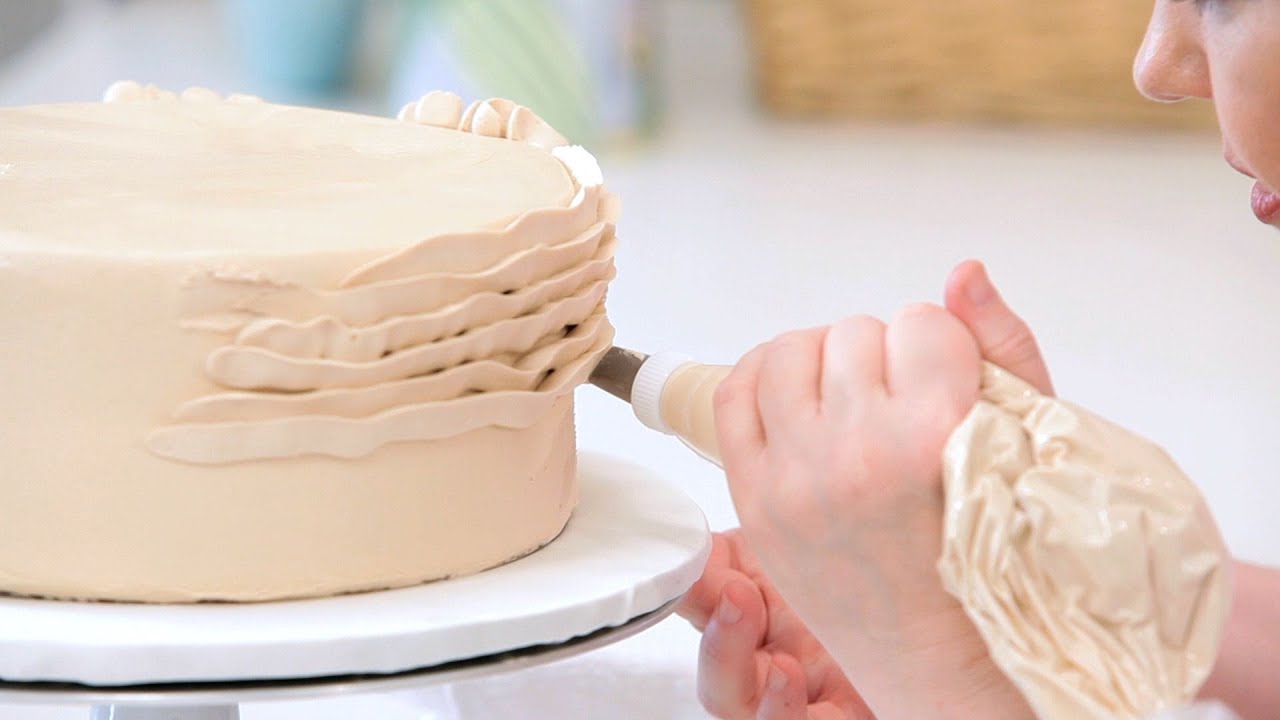
How to Pipe Ruffles on a Cake
Watch more Cake Decorating Tips and Tricks from CakeMade videos: http://www.howcast.com/videos/517439-How-to-Pipe-Ruffles-on-a-Cake
Learn how to decorate a cake with buttercream ruffles in this free video. For full online cake decorating courses check out CakeMade: http://bit.ly/1upK3jK
Hi! My name is Bronwyn Webber and I’m from Frosted Art Bakery in Dallas, Texas. I am teaching this online course for this three tier wedding cake on this chocolate silver plateau. Did you know that’s chocolate? It’s not silver. So in this course, you get to learn all kinds of piping techniques, a couple of really fast easy quick flowers and of course, how to make this plateau. But today, I’m going to show you a couple of neat things that you can do with the 104 tip. So, I hope you enjoy this little video and don’t forget to check out this course and see all the things that you’ll learn in it. I hope to see you there.
So I’m going to show you a couple of quick side designs you can use with the rose tip, also known as the ribbon tip or the 104 tip. It comes in 101, which a very small one, 102, 103 and 104, which is what we’re going to use today. There’s a couple of different variations in the brands. This one is an Attico tip and so it’s much thinner than the Wilton tip. I prefer the Attico tips but it is up to you and I’ll show you the difference for sure. So what you want to do is have a bag of icing, any color, any color. Pink’s my favorite. Put the tip on the end and there’s a fat end and a skinny end. So the first ruffle that I’m going to show you is actually a vertical ruffle, which is kind of fun. So you’re going to hold the fat end to the cake. So keep you fat end near the cake, all right? Let’s do it! So what we’re going to do is just a back and forth movement, really quickly and end at the bottom. And then you keep going a couple – and here we go again. And so you can see this will make a really neat effect if you do it over and over all the way around the cake. A really quick way to decorate a cake really quickly. It almost looks like an optical illusion. It’s pretty cool! And so to finish it off, you would definitely want to put a border on the bottom or raise this up and not put it on the border yet and then you can put the cake down as well. So that’s really fun but what happens if you do that same thing and squeeze really hard? I’ll show you. So I’m not even going to wiggle. I’m going to have the icing do all the work for me. Look at that. So I’m just going to squeeze really hard. It does it for me. Amazing! So that’s a neat ruffle trip and you can do that this way or this way as well.
Now here we go for ruffle cakes. You see a lot of them nowadays. You can do them starting at the top and so what I’m going to do is now I’m going to do ruffles this way. So I’m going to start at the top and just kind of squeeze a little bit. Go down a little bit more, squeeze and of course you would do this around the whole cake. So you can see this popular design all over but normally, it’s done with fondant but this is a way to do it with buttercream so that you don’t have to have that much of a commitment to fondant because that’s a lot of fondant when you’re making one of those ruffle cakes and a lot of time. So you want to squeeze and kind of randomly, you want to let the ruffles go where they lay, free and easy ruffles. So there you have it, lot of different kind of ruffles. Now, if you want to have it more controlled, what you can do is an up and down motion with that tip and we can start from the bottom this time. So keep the fat end towards the cake and you can give it an up and down motion like this and then right above that, you do the same thing. Up and down and then above that, same thing. So this is several different ruffles that you can do with the 104 tip.
You can see it would be really pretty if you did variations in the color but there you have one ruffle, two ruffle, three ruffle, four ruffle before you could even cover a cake in fondant. It’s pretty quick. Also what you can do with the ribbon tip is you can use it to make ribbons so if you were going to do a top border, you can go around your cake like this and add a ribbon. You could do that again and again and again and complete this ruffle look all the way on the top. And then of course, you can do swags with this tip, which is probably the classic thing to do with it so keep the fat end towards the cake, skinny end towards you, go down and then release the pressure as you come up. Down, release the pressure as you come up. Down and release the pressure as you come up. So there you have it – several things you can do with the humble 104 tip. To learn how to make a cake like this with everything you see here, cake, icing, modeling chocolate, and piping – p


![[ID: q_HuYkhsNEc] Youtube Automatic](https://okumasaati.net/wp-content/uploads/2020/10/id-qhuykhsnec-youtube-automatic-360x203.jpg)
![[ID: yAmGdn9t5Rs] Youtube Automatic](https://okumasaati.net/wp-content/uploads/2020/10/id-yamgdn9t5rs-youtube-automatic-360x203.jpg)
![[ID: tbVIsVKQ_3A] Youtube Automatic](https://okumasaati.net/wp-content/uploads/2020/10/id-tbvisvkq3a-youtube-automatic-360x203.jpg)
![[ID: PHnt56NewQs] Youtube Automatic](https://okumasaati.net/wp-content/uploads/2020/10/id-phnt56newqs-youtube-automatic-360x203.jpg)
![[ID: cnVNf5UTn9g] Youtube Automatic](https://okumasaati.net/wp-content/uploads/2020/10/id-cnvnf5utn9g-youtube-automatic-360x203.jpg)
![Private: [ID: j6LnTqld9a0] Youtube Automatic](https://okumasaati.net/wp-content/uploads/2020/10/private-id-j6lntqld9a0-youtube-a-360x203.jpg)